Feeds:
Posts
Comments

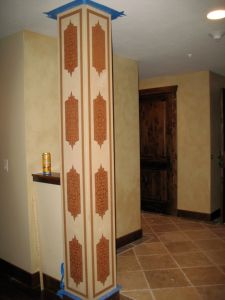
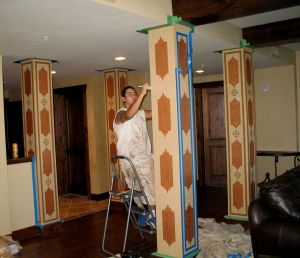
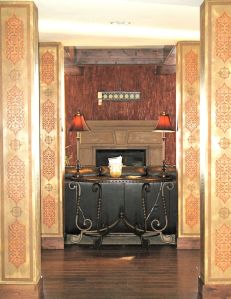
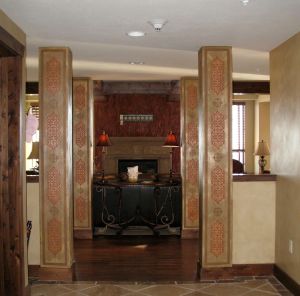
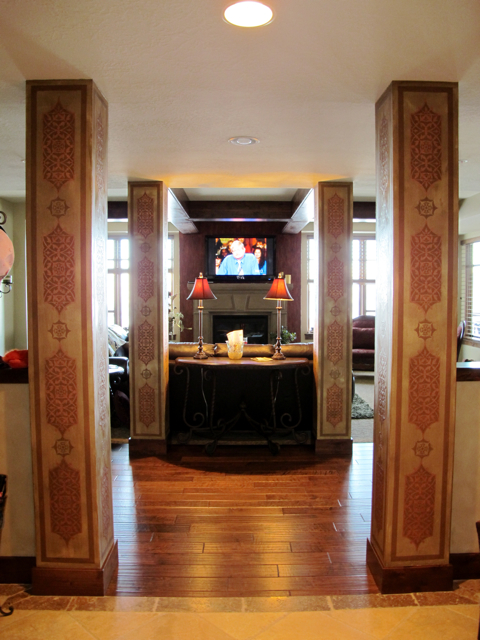
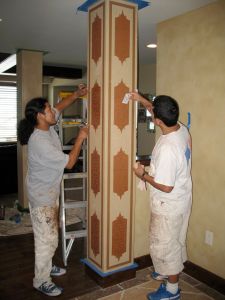
This is a project we recently completed using Stampino impressions/contours designed by artist Ron Hansen.    We saved a lot of money using the impressions/contours by not having to buy expensive vinyls to complete the project.  In total we needed 64 of these patterns which could have added big dollars to this project.  Using the re-useable impressions we were able to execute this project using only three impressions and one contour for a cost of about $45.00.  Ok now lets get to the Pro’s and Con’s:

Pro’s

1.  Well that’s an easy one.  Money saved by using the stencil impression vs. using an expensive vinyl.

2.  We only  used three impressions on the whole job and they held up nicely and are now ready for use again.  We troweled a lot of lusterstone through the impressions.  Washed and cleaned nicely without tearing or ripping.

3.  I was pretty amazed at how fast we were actually able to execute.  I really thought it would have taken a lot longer to complete.

4.  Designer & Client were happy, happy, happy!  Yeah…I think she’s ready for more.

Cons

1.  Other than the fact that I have very little patience, I really can’t think of any con’s that I felt strongly about.  I just couldn’t wait to see the end result!!  Possibly the fact that the impressions needed to be washed after each use, but because we had three of them going it really wasn’t that big of a deal and certainly not enough to keep me from doing this again.  I judge a lot of projects on “ease of application” on whether or not I will do it again.  I give this one a thumbs up!
Abstract Tree Creation

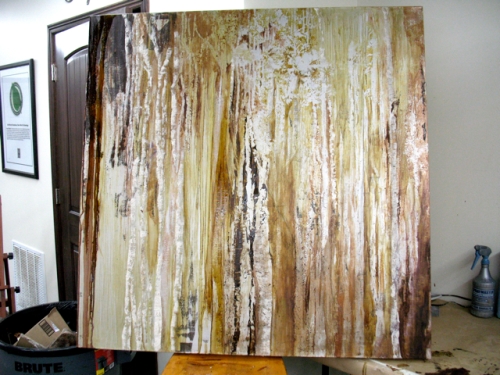
The canvas for sale

This is my latest piece of art created for a specific client in mind.  We talked on Thursday about how she is looking to purchase an original tree painting that goes along with the color schemes of her home. It just so happens that painting trees is one my favorite things to do!!!  I have been sketching and drawing trees since I was a small whipper-snapper and my passion for them has not waivered!

Let’s just hope my unsuspecting client likes it too…she has no idea that I went home and painted a picture right away.  I will post a final picture after I put on the top coat and I’ll let you know if she’s a buyer!  If not, it’ll be for sale!

Simple Glazing

Bread and Butta’ and not the kind you eat!
Well today was pretty uneventful!  Client called me Monday as she decided to commence on the glazing that I bid for her awhile ago.  The only time I had available that worked for both of us was today (thursday)  Lucky for me, Ryan one of my students has been eager to help on some jobs for OJT.  Gotta love that!  It really helps us both out and Ithink he feels better about glazing now.

Pros

1.  Client loved the color that I brought from my studio that was pre-mixed from an earlier project.  The color was perfect and worked great over her off-white/buttery walls.

2.  The walls were only 8ft high and its been a long time since I’ve had that!

3.  Used about one quart of glaze for the whole job.  My colorwash finish is my bread and butter.  Fast and easy.

Cons

1.  It was very hot in this little room, we kicked the AC down to 67 degrees and by the time we were finished I had finally stopped sweating.

2.  Ryan talks a lot!    LOL…just kidding!  🙂

Color Wash

Color Wash

Color Wash

Color Wash

Color Wash

Color Wash

Color Wash

Color Wash

Just heard from the owners that the judges commented on two things in the house…the awesome concrete floors and my two walls!  Yeah, maybe I’ll win “Best Faux!”  I don’t know if there is a category for that, but we’ll see.  The home turned out really nice!

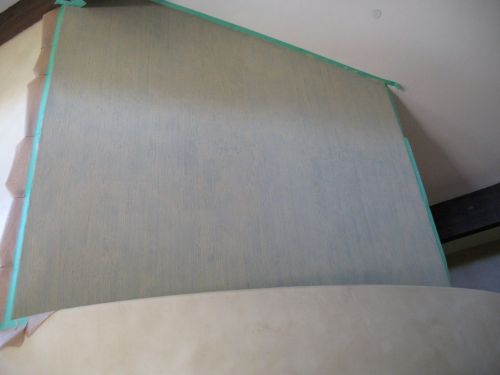
Ok, Initially this upper wall had been painted a green color that they thought would look more of an olive green, but in this main common area it “read” a more blue-y green.  The artist inside of me couldn’t let them do a matching glaze over it; which was how they were going to proceed.

I guess I should back up a bit….I trained their paint crew to do my color wash technique. They did the entire house and actually did a great job considering about 7 of them only had a one hour quickie lesson on how to execute.   I would have loved to do the job-but that’s ok it is an investment property and is already on the market.  So if you know of anyone who wants to buy a home in Park City, I’ve got the inside track!

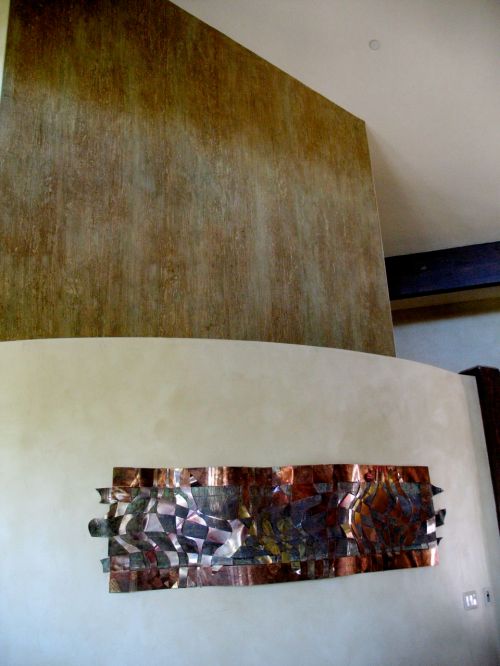
So back to the wall, we decided on the strie’ finish for this space too, just to add a little some’em, some’em as I always say!  I only wish the art piece could have been moved up to hang over my wall, but the artist had “stroke” when asked if he could move it…so for the time being it is where it is!

Pro’s

  1. Even though I still needed an extension ladder, the finish went much faster because it was a straight shot across.
  2. Using a superior product like Rs Stone made it easy to build texture quickly without any sag. (All in one pass)
  3. The milano tool is the best invention ever for glazing over texure!  Thanks Woolie Company for that invention and Kathy Wear for sharing it with me!!
  4. They had great music on today blazing over the surround sound!

Con’s

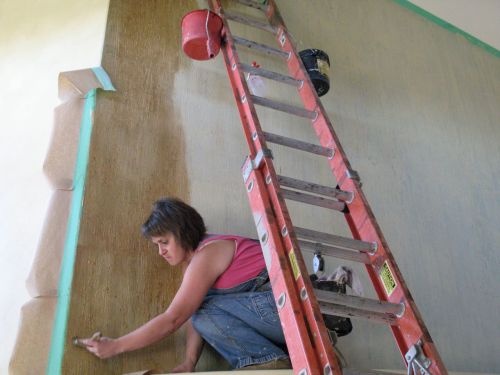
  1. As you can see, I have no where to put my tools.  Once I figure that one out I’m a rich girl!  So I’m going to share a nice tip.  I wear a shotgun shell bag used for hunting to hold my tools.  In it I can hold a rag, tape, chip brush, milano tool, knife and much more all right on the hip.  Love it and I have like three of them!
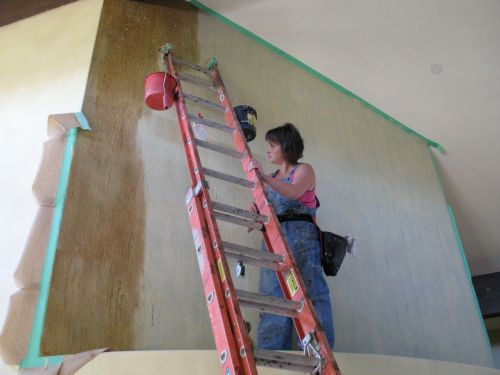
  2. Additionally, I have to lug my glazes up and hang them off the side of the ladder.  It is extremely important to be very careful when you do this…You do not want to knock it off and have “Mount Vesuvius” errupt. As Krista Vind would say, “Ask me how I know?”  Ugh!
  3. Because, I have to lug up my glazes…I also have to lug them down every time I want to move the ladder…again-we want to tame Mnt. Vesuvius!
  4. Did I mention going up and down the ladder a 100 times!
  5. Other than that, no other cons and I truly enjoyed this project.

Enjoy the pics!

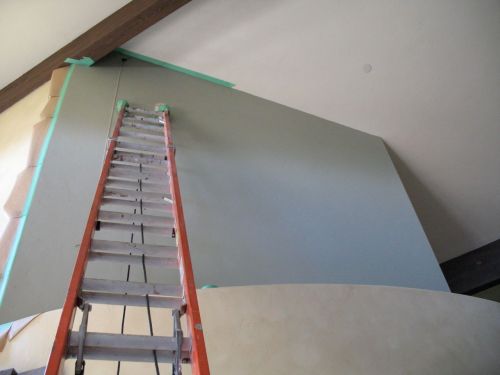
Taped and ready to go!

Taped and ready to go!

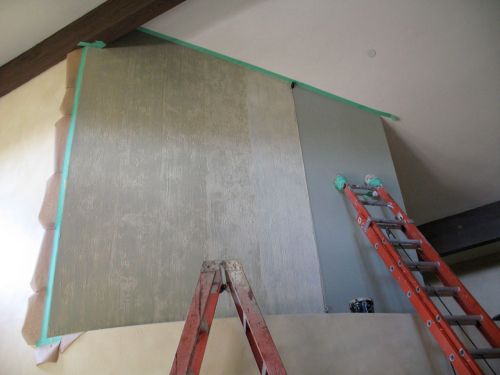
Progression of Strie of RsStone

Progression Strie of RsStone; you can see my plum line hanging from the ceiling. The black showing is also a velco ring. I used that to suspend from the railings in the stairwell. You'll see those pics further down on my blog.

Finished laying down my texture; dry overnight

Finished laying down my texture; dry overnight

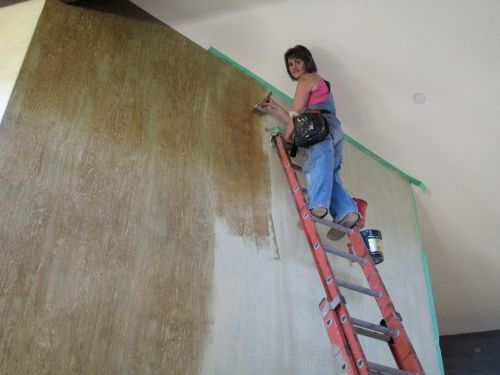
A 4 inch chip brush is nice for blending colors together!

A 4 inch chip brush is nice for blending colors together! Notice the spray bottle hanging off the ladder...that is my slip coat~water only, not more glaze which in my opinion wastes product.

Just getting started with the glazing

Just getting started with the glazing

Loaded up and half way done!

Loaded up and half way done!

Close up of the strie'

Close up of the strie'

Complete picture with the copper art.

Complete picture with the copper art.

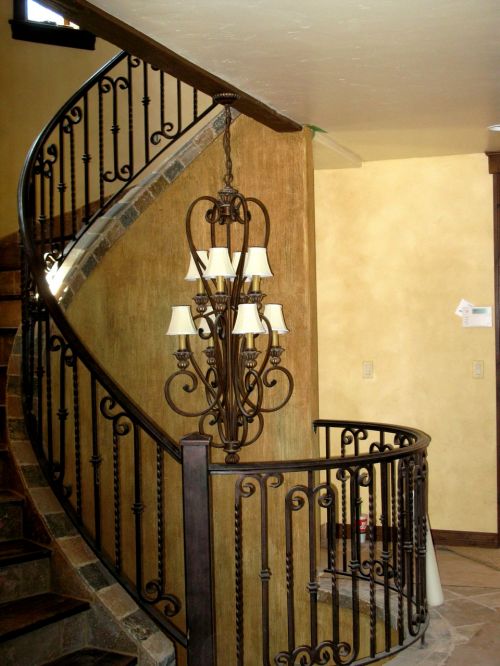
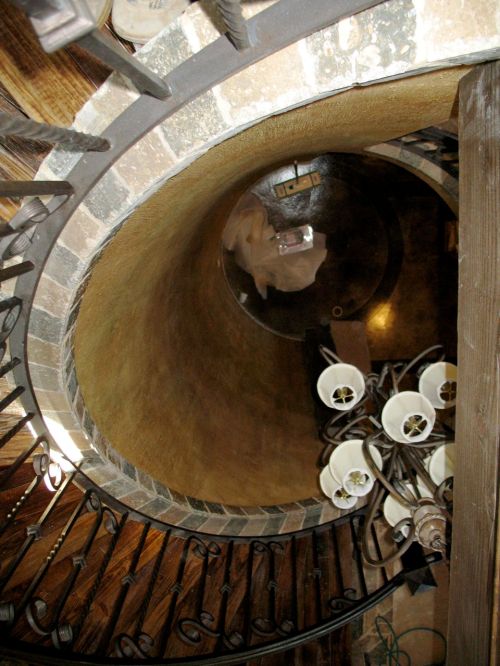
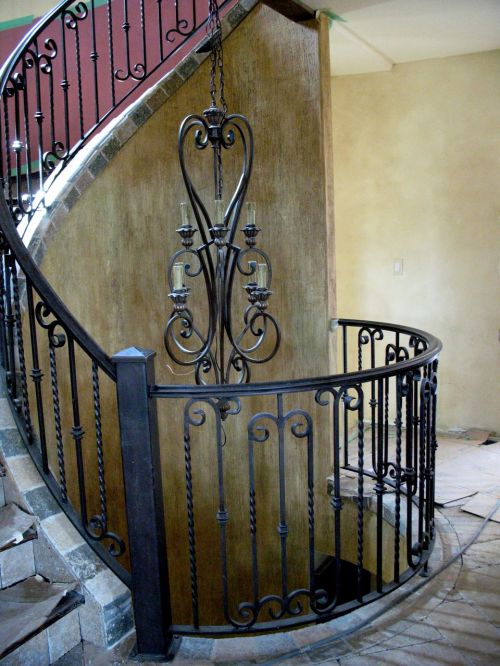
Ok here are some final pics again with the lanterns on the light fixture now…so it looks more completed.  I also included a picture looking down into this area from the top of the spiral staircase.   Just to show how tight the space was….

Completed area with lanterns now!

Completed area with lanterns now!

From the top of the stairwell looking down!

From the top of the stairwell looking down!

Well better late than never!  I was asked by a lovely couple in Park City, Utah to complete two walls for their “Parade of Homes” home.  The dates for the tour is August 22nd and 23rd,  August 29th and 30th, as well as September 5th and 6th.  So if you should happen to be in the area during these dates please be sure to stop by and say hello!

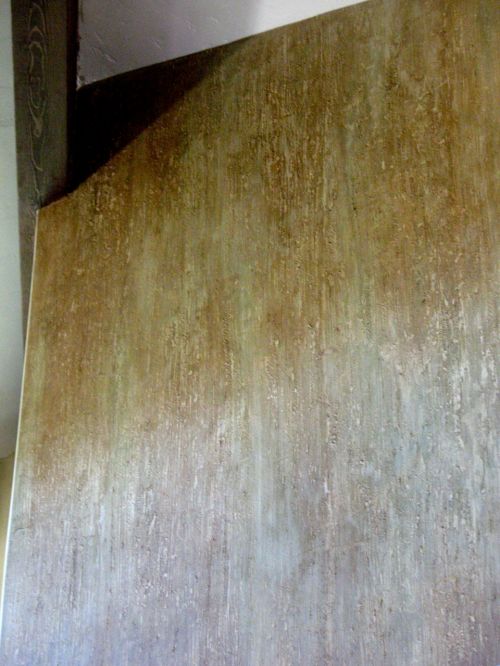
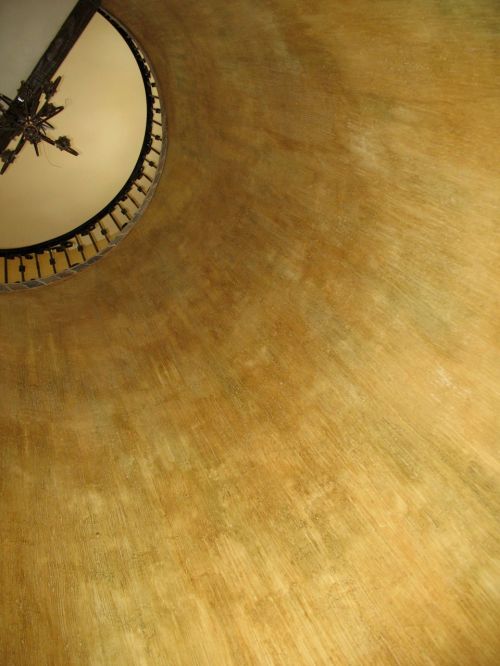
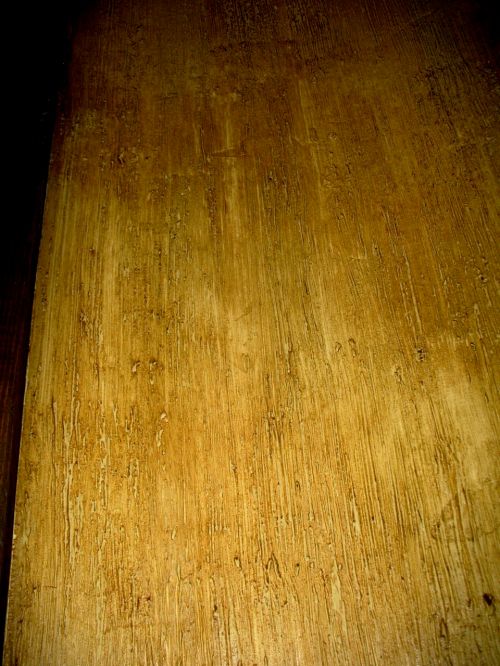
The finish is an Rs Stone Strie’ with multiple glazes over top!  I used a great tool for the combing effect which was executed fairly quick.  Once the plaster began to set up, I lightly knock it back down in random places creating some “flattened” areas. (But not too flat, its important to make this very random so that the finish does not look contrived and forced)  I let it dry over night and colored it simultaneously with two seperate color glazes.  Once I rolled out my section I would pull the glaze tight with the Milano tool!  (which is another fabulous tool for textured finishes) My favorite saying for an easy finish~ “Done!!!”

Pros

  1. A two step finish -Thank goodness! Wait until you see the space I had to work with…cool but constraining!
  2. Using Rs Stone and an activator, one can thicken the product to give it more body, thus allowing it to hold its’ form nicely without sag.
  3. Easily able to form shapes and quickly build layers.  These are all done in the first pass.
  4. Perceived complexity, but relatively an easy to execute finish.
  5. I impressed the contractors and owner even after the first layer was completed!  Two thumbs up!
Cons

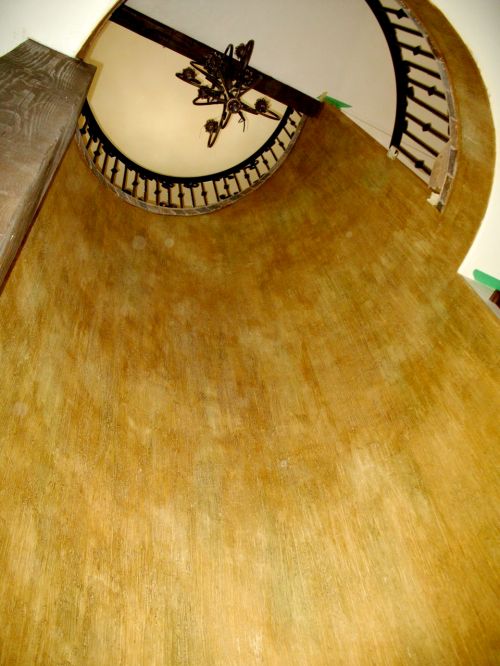
  1. Height and ease of movement was definitely a challenge.  From curve to curve at the widest opening there was about 5 feet max. From the floor to the highest peak was approximately 20 feet high.   I have to say, getting a 24′ extension ladder to the bottom of the house was quite interesting.  Ryan who is one of my students helped me hoist the ladder over the spiral staircase and together we gently lowered it to the ground level.
  2. Creating somewhat of a straight line in the strie’ effect…hmm~  Even though I was not worried about perfect vertical lines, I used my homemade plum line as a guide.  My home made plum line basically is a “rope” cord about the thickness of something your grandma used to hang the laundry on outside.  Tied at one end of the cord is a weight and in my case this was a two pound pulley.  I use a push pin to secure the other end of the rope to the ceiling or along the top of the wall. I let the rope suspend to the floor and created a straight line guide.  Note:  It is better to suspend the rope from the ceiling when possible if you will trowel on texture. This keeps the rope from sticking to the product on the wall. Even though this is a fast way to create a guide when executing a strie’ finish, I put it in my con’s list because it took up more labor time to execute in an otherwise tight space.
  3. Having to constantly switch out ladders.  Definitely pre-plan for your tools and your ladders when scoping out a job. The “pain-in-the-butt” thing about executing this finish was having to constantly rotate ladders for the space.  I only used the 24′ for about 10 minutes when I started to reach the highest point.  Next, I had to transition over to my 16′ extension to reach the middle sections and for the bottom of the wall my little giant.  And no, before you even ask my little giant extended out to make a ladder was not long enough for the job at hand.

As I said, I’m glad this was only two passes…enjoy the pictures.

Bottom to the Top Strie' 2009

Bottom to the Top Strie' 2009

Another View looking up from the bottom 2009

Another View looking up from the bottom 2009

Close up of Strie' 2009

Close up of Strie' 2009

Close up of the Strie' pattern

Close up of the Strie' pattern

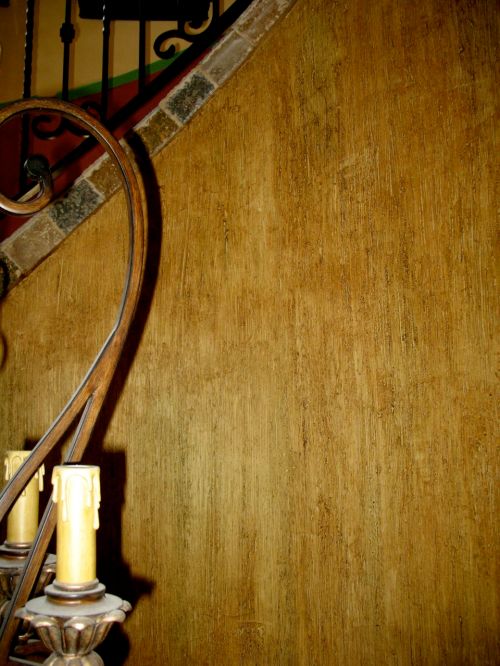
Captured from the main common area 2009

Captured from the main common area 2009

IDAL 2009 Memphis!

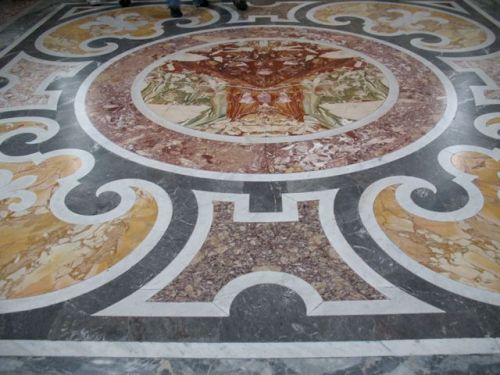
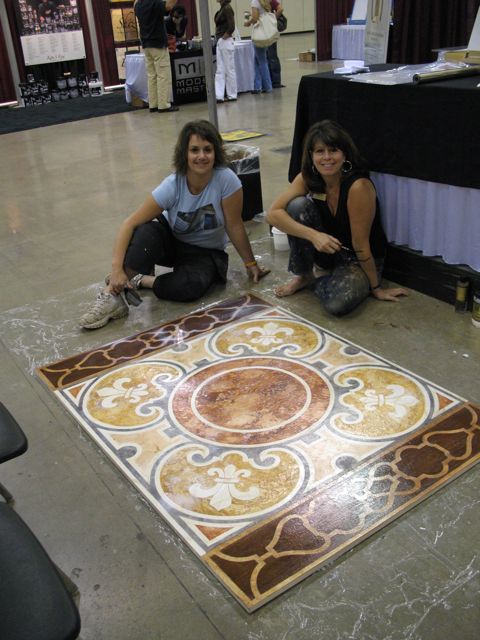
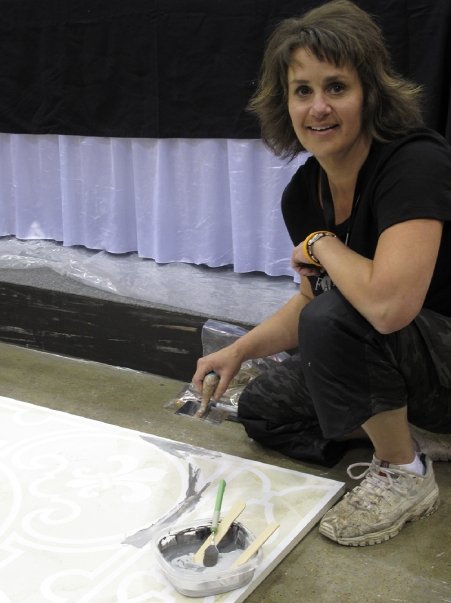
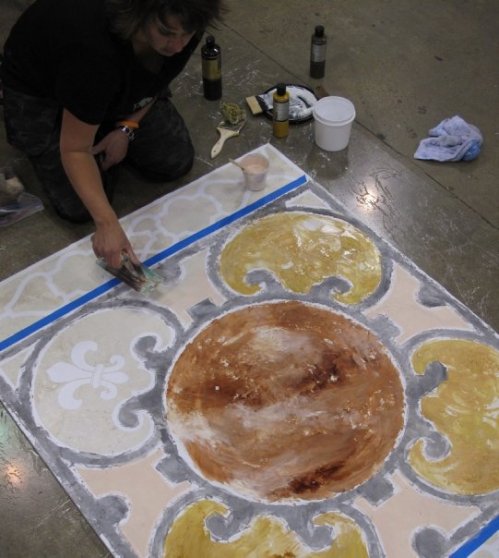
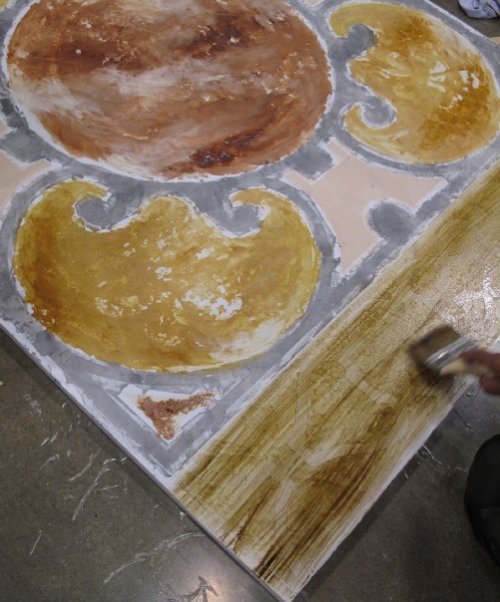
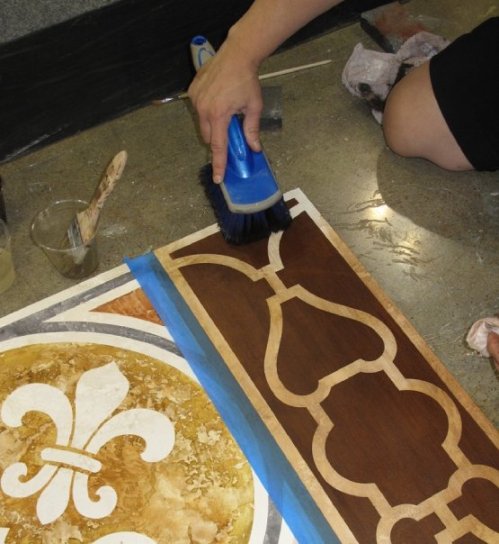
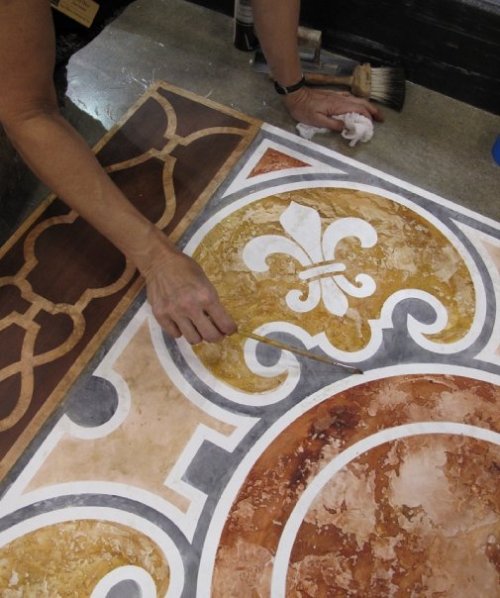
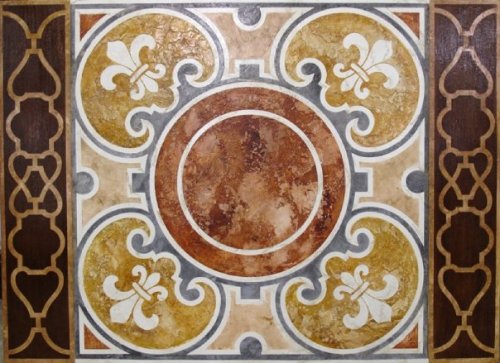
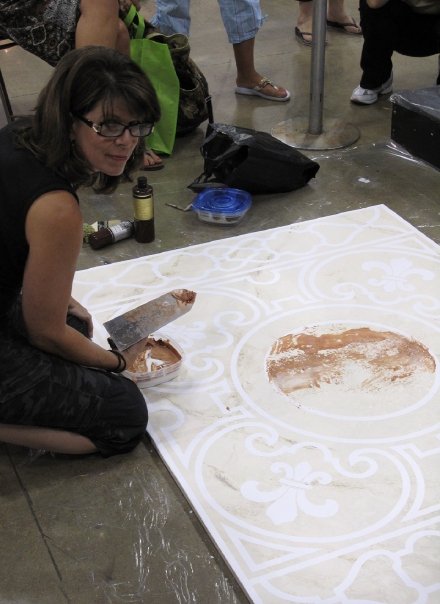
Recently, Kathy Wear and I (she co-teaches the RsSeries class with me) went to Memphis, Tennessee in July for the International Decorative Artisans League.  We demonstrated a mini-floor replica from a photograph that I snapped at the Vatican last October.  The material we used was Rs Crete.   You will see partial photos of the work in progression.  I  had not planned on doing a blog at the time, so the pictures are not completely step by step.  A special thank you to Modello Design for their speedy response and design of the vinyl used for our inlay.  For more information on Modello’s go to:  www.modellodesign.com


Using Rs Crete to replicate a floor seen in Italy!

Our Inspiration floor from the Vatican!


This was really exciting to do as we just winged the finish right on the spot!  Sometimes that just works!  At least that does for me, Kathy~ not so much!

This was really exciting to do as we just winged the finish right on the spot! Sometimes that just works! At least it did for me, Kathy~ not so much!


Starting to layer the Rs Crete

Starting to layer the Rs Crete


Rs Crete over the modello

Rs Crete over the modello

Getting a bit closer and adding various colors to create the marble patterns.

Working on the smaller areas of the marble design

Inlay Marble

Starting the Inlay Wood grain using Master Finishing Medium


Putting the finishing touches on the Faux Inlay Wood grain

Putting the finishing touches on the Faux Inlay Wood grain


Weeding out the Modello design

Weeding out the Modello design and adding some touches here and there!


Completed Floor

Completed Floor

Hello world!

Hello everyone and welcome to the official blog for MBM Designs (AKA Murals by Mindy).  It is my intent from this point forward to bring you chronological photos of our projects in progress!  Why?   I can not tell you how many times people have asked to see progression photos of their projects from start to finish and what a better way to do so than a blog!  Look for photos to come soon…and don’t be surprised if your next project ends up on my blog!

I will discuss the job in great detail including the pro’s and con’s of each day’s progression!  Things that worked out great and those that didn’t.  Not only will this be a fun tool for my clients, but it will serve as a training guide and tool for other artisans who may attempt similar projects!  Be on the look out for my upcoming project in a few weeks:  Carved Concrete…oh boy!